In a nutshell
- 🔥 Radiator shields reflect radiant heat and add light insulation, cutting back-loss through external walls and keeping rooms consistently warm.
- 🎯 Pinpoint insulation targets high-leak spots (behind radiators, window reveals, skirting), delivering quick comfort gains where whole-house retrofits are tricky.
- 🛠️ Installation tips: fit flat to the wall, seal edges with foil tape, avoid blocking TRVs or airflow, and prioritise external-wall radiators.
- 📊 Costs and payback: low material outlay and 20–45 minutes per radiator; typical payback in 1–3 winters, strongest on external brick walls.
- ⚖️ Pros vs. cons: immediate comfort, DIY-friendly, reversible; limited gains on internal walls and poor fits risk moisture traps or reduced reflectivity.
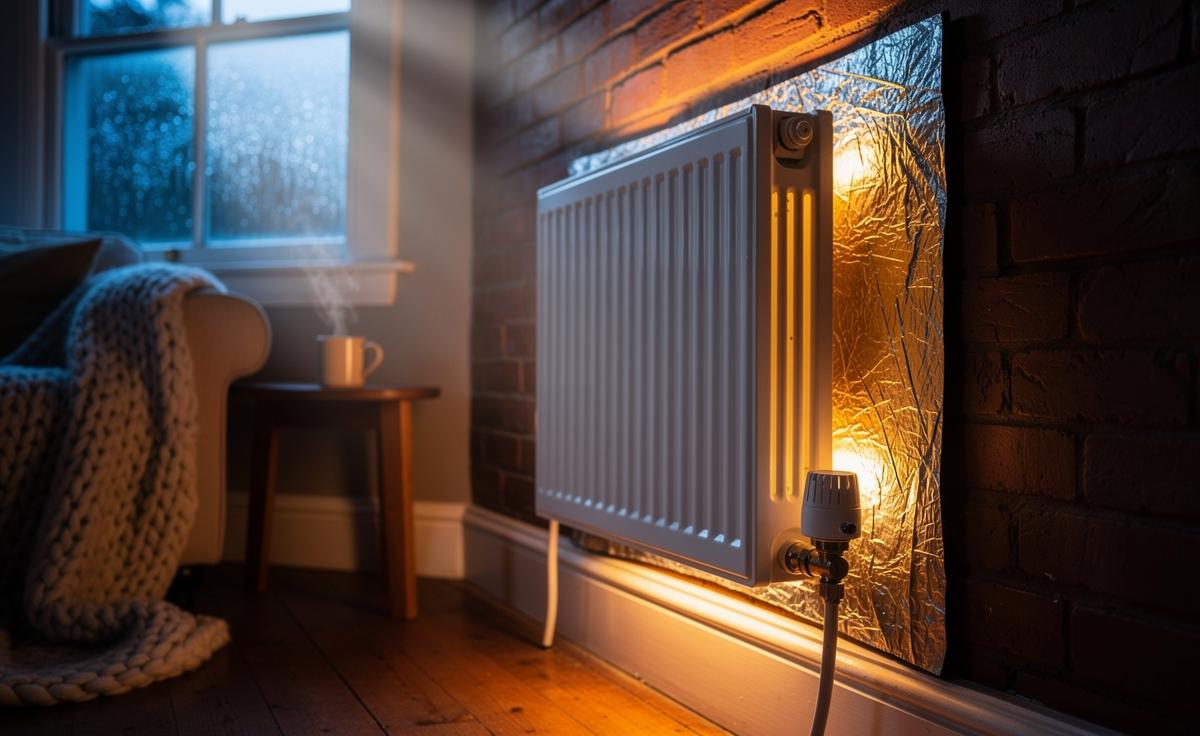
In a draughty British winter, the wall behind your radiator can behave like a silent thief, siphoning off heat you’ve already paid for. A simple radiator shield—a thin reflective and insulating panel placed behind the radiator—works as pinpoint insulation, redirecting warmth into the room rather than into the brickwork. Done well, it smooths temperature swings, reduces boiler cycling, and makes the space feel consistently cosy without cranking the thermostat. The secret isn’t brute force heating, but carefully stopping the worst escape routes. This piece unpacks the physics, the practicalities, and the real‑world gains, showing why precision retrofits can out‑perform scattergun upgrades in many UK homes.
How a Radiator Shield Works: The Physics Behind Toasty Rooms
Radiators don’t just heat by convection; they also radiate from the back panel. When the unit sits on an external wall, that back‑face energy can be lost to the outside through conduction and thermal bridging. A radiator shield interrupts this loss in two ways. First, its reflective foil sends long‑wave radiation back towards the room. Second, its insulating core raises the temperature of the wall interface, throttling heat flux into the masonry. Together, these effects stabilise room warmth and reduce the thermostat’s call for heat. Every watt you bounce back into the room does double duty—comfort rises while energy demand falls.
There’s also a subtle airflow benefit. By warming the air just behind the radiator less intensely, the shield can produce a smoother convection plume that spreads heat more evenly. In older terraces where cold spots linger near external walls, that evenness matters. It can lessen the “toasty by the radiator, chilly across the room” pattern that wastes fuel and undermines comfort. Think of it as a targeted U‑value upgrade precisely where heat would otherwise leak fastest. For homes on timers and smart schedules, that means quicker warm‑up and slower cool‑down between heating cycles.
Pinpoint vs. Whole‑House: Why Precision Pays in Old UK Homes
Whole‑house insulation is the gold standard, but many UK properties—solid‑wall Victorians, mixed‑fabric semis, or flats with leasehold limits—aren’t easy candidates for deep retrofits. Pinpoint insulation excels because it tackles high‑impact locations without expensive disruption. Behind radiators, around window reveals, and beneath bay sills, small interventions prevent concentrated losses that behave like punctures in a hot‑water bottle. Seal the punctures first, then top up the warmth. In practice, that approach complements loft and draught‑proofing, delivering immediate comfort while you plan bigger works.
In one Hackney flat, a tenant installed foil‑faced boards behind two radiators on external walls and sealed skirting gaps. The room reached setpoint faster and kept its warmth longer after the boiler cycled off. That lived reality mirrors what careful modelling predicts: lower back‑loss, softer heat‑up ramps, and fewer on/off spikes. Crucially, it’s reversible and low‑risk in rentals. For homeowners, these quick wins can trim heat demand ahead of pricier upgrades such as external wall insulation or triple glazing—handy in a high energy‑price era.
| Target Zone | Main Issue | Recommended Material | Expected Effect | Difficulty |
|---|---|---|---|---|
| Behind radiators | Back‑face heat loss | Foil‑faced foam or reflective roll | Warmer room, faster warm‑up | Low |
| Window reveals | Cold bridging at edges | Thin PIR board + foil tape | Reduced downdraughts | Medium |
| Skirting/architraves | Air leakage | Decorators’ caulk | Fewer draughts | Low |
Installation Playbook and Common Pitfalls
The best shields combine a reflective surface and a modest insulating layer, sized to fit within your radiator’s brackets. Start by measuring the panel, noting pipework and the thermostatic valve. Cut a foil‑faced board or use multi‑foil roll with a thin foam backing. Fix to the wall—not the radiator—using adhesive dots or low‑profile strips to avoid creating big gaps that can trap moist air. Seal edges with foil tape to preserve reflectivity and deter dust. A tight, flat install matters more than maximal thickness—you’re crafting a smart barrier, not building a cushion.
Avoid common traps. Don’t block the TRV sensor or impede airflow beneath the radiator, or you’ll skew control and reduce output. Keep clear of flaking paint; prime or clean first so adhesives bond. In kitchens and bathrooms, consider a light vapour‑open approach to limit condensation risk on cold walls. If your wall is visibly damp, fix that before insulating—shields deter heat loss, but they won’t cure ingress. Finally, check you can still access valves for bleeding and maintenance. If in doubt, trial a removable panel first and monitor comfort and cycling over a week.
- Tools: sharp knife, straightedge, tape measure, foil tape, adhesive strips
- Clearances: maintain radiator back clearance; don’t compress pipes or sensors
- Checkpoints: stable bond, tidy seams, unobstructed airflow
Pros and Cons, Costs, and Payback: What the Numbers Suggest
For modest outlay, a radiator shield yields a credible comfort dividend. Pros include quicker warm‑up, fewer cold zones, and small but steady energy savings—strongest on external walls and in uninsulated rooms. It’s DIY‑friendly, reversible, and landlord‑tolerant. On the flip side, benefits shrink on internal walls or where heavy furnishings block convection. Poor installs can crinkle the foil, reduce reflectivity, or trap moisture on problem walls. Precision beats thickness: a neat, well‑sealed, appropriately thin shield generally outperforms a sloppy, bulky one. Treat it as part of a layered strategy alongside loft insulation, draught‑proofing, and smart controls.
Costs are predictable: a few pounds per radiator for reflective roll; a little more for foil‑faced foam cut to size. Time per unit is under an hour once you’ve measured and templated. Payback depends on energy prices, wall type, and run‑time. Many households see the biggest comfort wins immediately, with fuel savings accumulating quietly over the season. Where radiators back onto external brick, savings are notably stronger than on stud walls. A quick audit—external vs internal placements, wall condition, and occupancy patterns—helps estimate returns.
| Option | Typical Cost | DIY Time | Best Use Case | Indicative Payback |
|---|---|---|---|---|
| Reflective foil roll | Low | 20–30 mins | Rented homes, quick trials | 1–3 winters |
| Foil‑faced foam board | Low–Medium | 30–45 mins | External walls, colder rooms | 1–2 winters |
| Pre‑cut commercial panel | Medium | 15–25 mins | Neat finish, time‑poor users | 1–3 winters |
- Pros: Low cost, immediate comfort boost, complements other retrofits
- Cons: Limited gains on internal walls, needs careful fitting, aesthetic tweaks required
In the race to keep rooms toasty without eye‑watering bills, pinpoint insulation is the quiet performer: small fixes, smartly placed, that tame the worst heat leaks and stabilise comfort. A tidy radiator shield often punches above its weight, especially in older homes with external‑wall radiators. Paired with draught‑proofing and sensible controls, it’s a pragmatic step on the path to deeper efficiency. Start where the heat is leaking fastest, measure how the room feels, then build from there. Where in your home would targeted insulation make the most noticeable difference next?
Did you like it?4.5/5 (25)