In a nutshell
- 🧭 Adopt consistent placement to prevent moisture “microclimates”; keep predictable zones, leave a finger’s breadth between hangers, and let fabrics breathe to stop musty odours forming.
- 📦 Perform the wardrobe shift: move units 5–7 cm off external walls to break cold bridges, add slatted/wire storage, and label zones—small tweaks that dramatically improve airflow.
- 📊 Track relative humidity (RH) at 45–55% with a mini hygrometer; use silica gel for buffering and calcium chloride for spikes, and verify performance by weighing desiccants.
- ⚖️ Weigh Pros vs. Cons: dehumidifiers and desiccants help, but scented sachets only mask smells—pair tools with structural fixes like spacing and the wardrobe shift for lasting results.
- 🧵 Embed a cool-dry-stow routine: use an external drying hook for damp items, keep doors ajar after showers, ventilate gym kit, and maintain stable layouts for reliable, mould-proof storage.
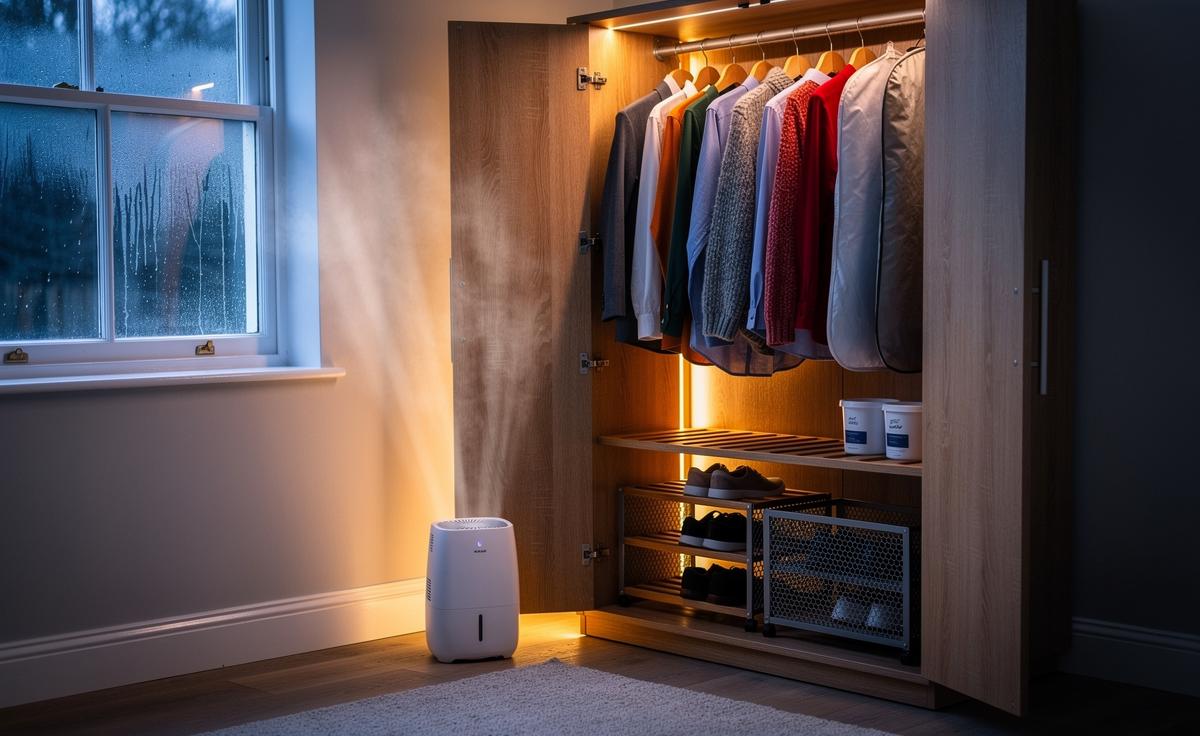
In a damp-prone British winter, that sour, musty odour creeping from drawers isn’t a mystery—it’s physics meeting habit. Simple condensation, trapped air, and crammed textiles give mould a microclimate to bloom. The overlooked fix is a quiet discipline: consistent placement of garments and a small but strategic wardrobe shift away from cold walls. By keeping items in stable zones with breathing gaps—and moving the wardrobe itself to prevent cold bridging—you flatten the peaks and troughs of humidity inside. Small, repeatable choices beat occasional deep cleans. Here’s how this newsroom-tested method, gathered from households, housing officers, and conservation pros, keeps clothes fresher for longer without turning your bedroom into a drying room.
Why Consistent Placement Beats Mustiness
Moisture likes chaos. Every time we reshuffle a closet—piling wool with denim one week and shoving a damp scarf next to silk the next—we create new microclimates. Fabrics store moisture differently: cotton breathes and releases; wool buffers; synthetics trap. When placements jump around, moisture pockets migrate, condense on cold surfaces, and feed mould. By contrast, consistent placement keeps airflow paths predictable. Think of it as traffic management for vapour: designated zones for heavy fibres, light knits, and outerwear maintain stable humidity, so there’s less chance of the dew point being reached inside your wardrobe.
In practice, that means a “set-and-hold” map: knits on slatted shelves; shirts spaced evenly; shoes on a ventilated rack at the bottom. Leave a finger’s breadth between hangers as standard—or two for bulky coats. The psychological win matters too. When you always hang a damp mac in the same vented spot, you remember to check it; when socks live in a breathable basket, you notice if they’re clammy. Over a month, these small consistencies become a system that steadily denies mould the stagnant air and lingering damp it needs to bloom.
The Wardrobe Shift: Move, Space, and Label for Airflow
Many UK flats place wardrobes tight to external walls. That’s a condensation trap: the rear panel cools, moisture inside the wardrobe condenses, and sleeves go sour. The fix is surprisingly low-effort. Shift the wardrobe 5–7 cm from the wall, add felt pads to feet, and, if possible, site it on an internal wall. You’re breaking the cold bridge and creating a chimney gap where air can rise and carry moisture away. If your home has trickle vents or a dehumidifier, orient the wardrobe door towards that airflow to sweep out latent vapour.
Next, build a labelling habit. Mark shelves by fabric type, fit slatted bases or wire baskets, and stick to a universal spacing cue: two fingers for knitwear, one for shirts. Use breathable bags for occasionwear, not plastic. A quick case study: in Bristol, Hannah kept a fitted wardrobe on a north-facing wall. She nudged it 6 cm forward, removed a solid shoe box at the base for a mesh rack, and labelled a “damp return” hook on the door. Within two weeks, the odour vanished and a patch of grey on a cotton blouse didn’t recur.
- Keep doors ajar 15–20 minutes after showers.
- Rotate desiccants monthly; weigh packs to confirm moisture capture.
- Store gym kit in a ventilated tote until fully dry.
Moisture Maths: RH Targets, Materials, and Routine Checks
Mustiness follows the numbers. Relative humidity (RH) inside a wardrobe should hover around 45–55%. Below that, fibres get brittle; above 60%, mould risk climbs. Aim for 45–55% RH and audit it like a budget: pop a mini hygrometer on the middle rail and note morning and evening readings for a week. Materials matter, too. Chipboard and MDF trap moisture at the back; solid wood and wire breathe better. If you’re renting, you can retrofit breathing room with stick-on standoffs, a slim wire shelf, and a mesh shoe rack to lift leather off the floor.
| Wardrobe RH | Risk Level | Simple Action | Check Frequency |
|---|---|---|---|
| 35–45% | Low (too dry) | Reduce heating bursts; avoid overusing desiccants | Weekly |
| 45–55% | Ideal | Maintain spacing and placement; keep 5–7 cm wall gap | Weekly |
| 55–65% | Moderate | Open doors 20 minutes daily; run dehumidifier nearby | Every 3 days |
| 65%+ | High | Move wardrobe off external wall; add calcium chloride trap | Daily |
Use silica gel for gentle buffering and calcium chloride when RH spikes—never directly against garments. Weigh desiccant tubs to verify they’re capturing water rather than guessing. Crucially, keep your layout fixed: consistent zones make your RH readings meaningful, because the microclimate isn’t changing under your feet.
Pros and Cons of Common Anti-Damp Tactics
Quick fixes can mask the real issue. Scented sachets are pleasant, but they perfume moisture rather than removing it. Why “more fragrance” isn’t better: it can hide early mould cues you need to detect. Charcoal bags absorb odours and some humidity, but require sun-drying to regenerate—hard in a UK winter. Dehumidifiers work, yet if the wardrobe hugs a cold wall, you’re fighting a losing battle. The grown-up strategy pairs consistent placement with a structural tweak—the 5–7 cm wardrobe shift—and then layers light support like desiccants.
- Dehumidifier:
Pros—fast RH drop; Cons—running cost, noise. - Desiccant tubs:
Pros—cheap, silent; Cons—spill risk, limited capacity. - Scented sachets:
Pros—smell nice; Cons—no moisture control. - Wardrobe shift + spacing:
Pros—prevents condensation; Cons—needs floor space.
For textiles, adopt a cool-dry-stow triage. If a garment was outdoors or in the gym, it goes to a “drying hook” on the wardrobe’s exterior until its hygrometer sticker reads normal—or it simply feels cool and crisp. Only then does it return to its marked zone. Consistency is your cheapest anti-mould technology: the more predictable your storage, the fewer musty surprises.
As a reporter who’s stood in countless chilly bedrooms from Leeds to Lewisham, I’ve seen the same pattern: move the wardrobe slightly, fix the airflow, keep a steady layout, and the smell fades. It’s unglamorous, but it works—and it respects tight budgets and rented walls. Start with the 5–7 cm shift, set your zones, and guard that spacing like a habit. From there, let data guide you: a £10 hygrometer, a weekly glance, and a monthly desiccant swap. What’s your biggest barrier to creating a consistent, breathable wardrobe—layout, time, or the architecture you’ve inherited?
Did you like it?4.4/5 (23)